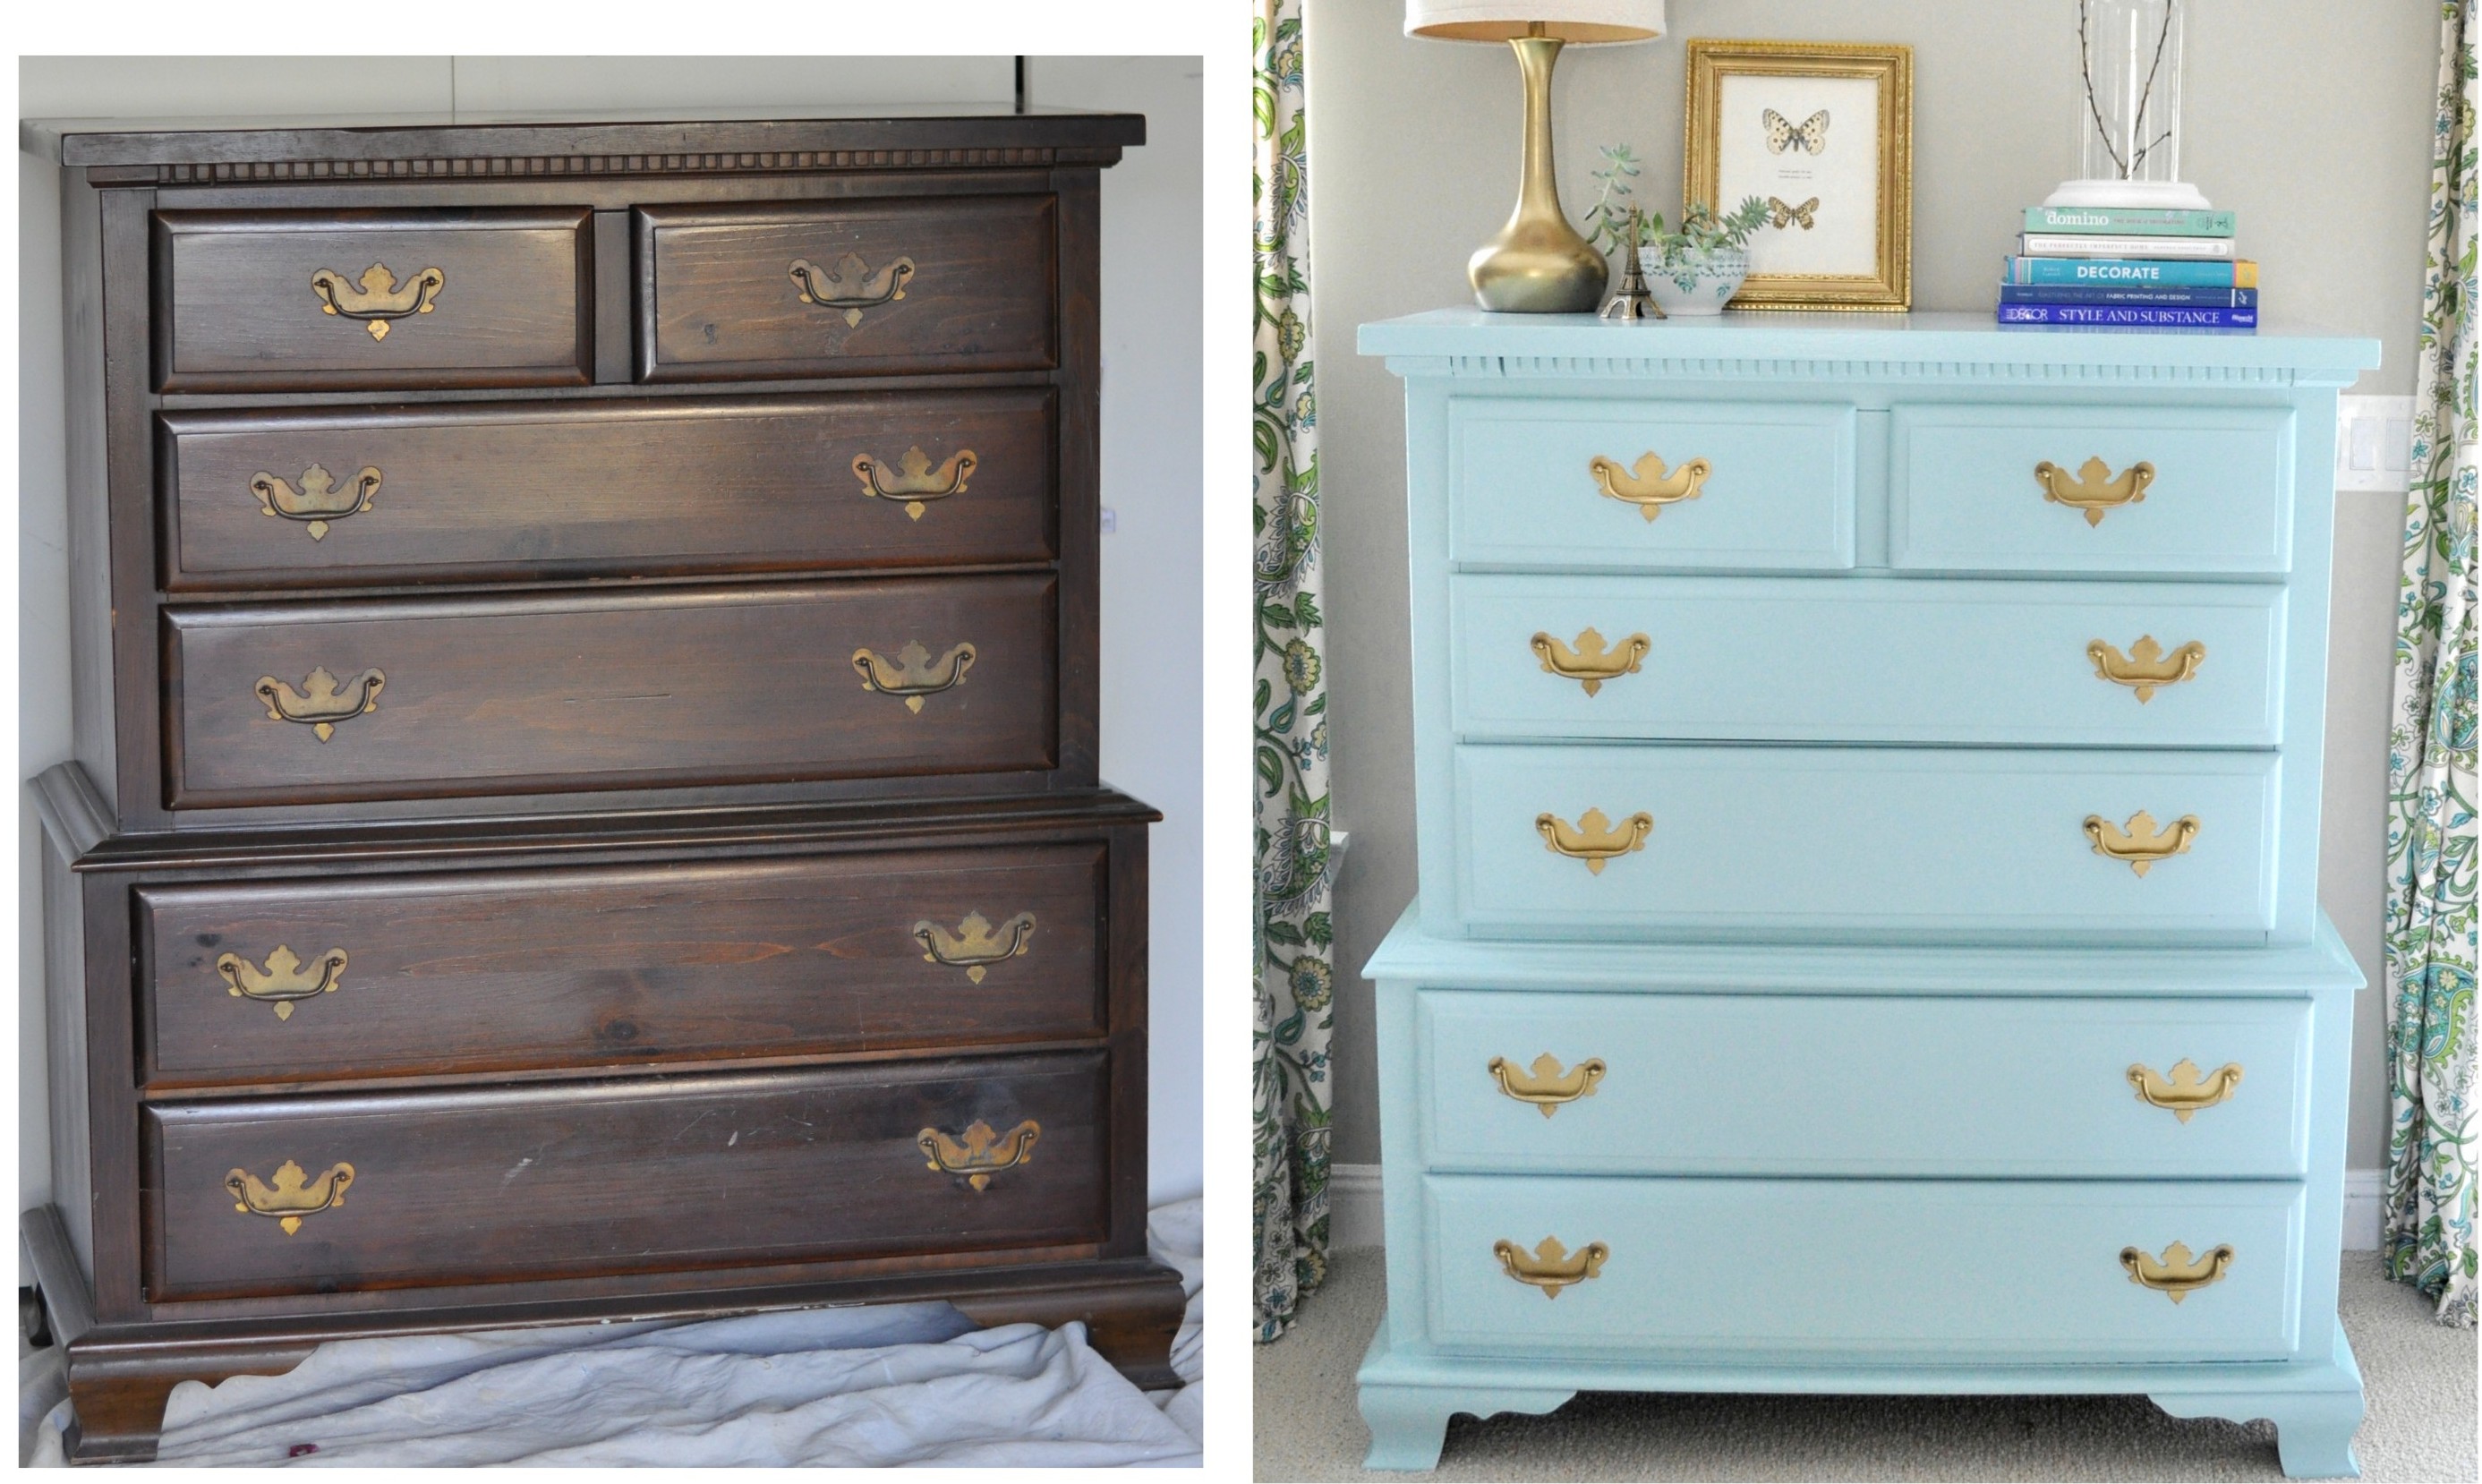
From Pinterest to countless DIY blogs, there are so many tutorials to redo furniture that has been sadly sitting around your house.
You walk past it every day and every now and then stop, tilt your head, and wonder what it would look like with a fresh coat of paint or a new finish. Well make this weekend the weekend to find out!
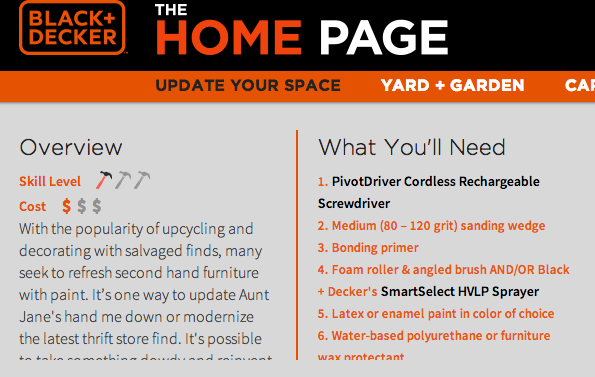
You can buy many of the DIY tools you may need from a company such as Black & Decker, but did you know you can also get project instructions from them?
This is great because it saves you time searching for the tools that the tutorials are using, many of them don’t even name them! Black & Decker has links right there in the instructions:
Here is a fantastic DIY project to get that dresser in tip-top shape:
Step 1:
Remove Hardware: First things first, remove all hardware before you begin. Black + Decker’s PivotDriver Cordless Rechargeable Screwdriver is great to have on hand to work without a cord wherever you’re refurbishing and will remove hinges and pulls quickly.
Step 2:
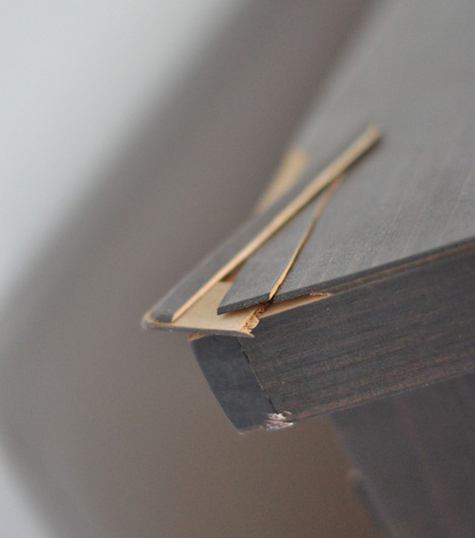
Patch Damage: Wood glue works wonders to repair pieces that are chipped or broken. Apply it to the damage (if any), clamp if necessary, and wait 24 hours for the glue to cure. Wood filler will cover or fill those unsightly blemishes or scratches, apply it before sanding or priming your piece. If you’ve opted for new knobs, often they will fit right in the old holes, but many modern pulls are sized differently than the old hardware. Wood filler is also your best bet for starting over with new hardware.
Step 3:
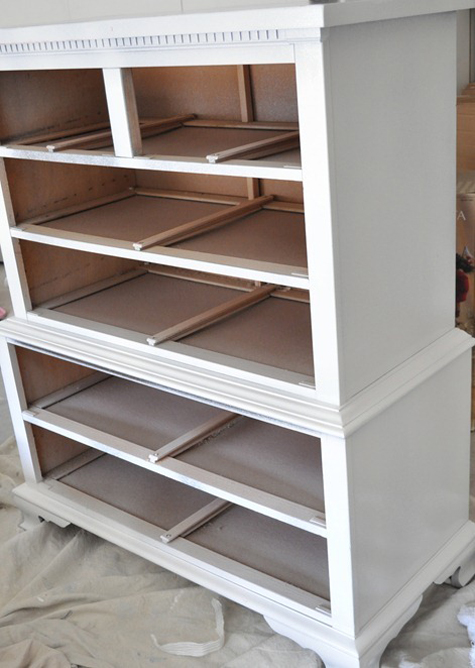
Sand and Prime: If your piece is in good condition, you can skip the sanding step and go straight to priming your piece. Bonding primers don’t require sanding, even if your piece is heavily varnished, but giving the furniture a good scuffing with a medium (80 grit) sanding wedge not only helps clean off any debris, but gives your primer a better surface to cling too. If you want a paint job that will last, using a good bonding primer is key. If you’re going to take the time and energy to paint a piece, take the time to prime it too. If using the spray version instead of a brush on formula, be sure to work in a well-ventilated area and dispose of your cans according to your local waste regulations. If using a brush, apply it with a foam roller and follow up with a brush. Once you’re primer is fully dry, sand away any drips or residue and wipe your piece down with a soft cloth.
Step 4:
Paint: Invest in the best quality paint you can afford, you can use latex or enamel paint to refinish furniture. Never skimp with just one coat, two is always best for uniformity and even coverage, allowing 6 to 8 hours of drying time between coats. If painting by hand, a high-quality angled paint brush is also essential. However, with the Black + Decker SmartSelect HVLP Sprayer you can apply two thin coats of paint quickly and easily and in a uniform manner.
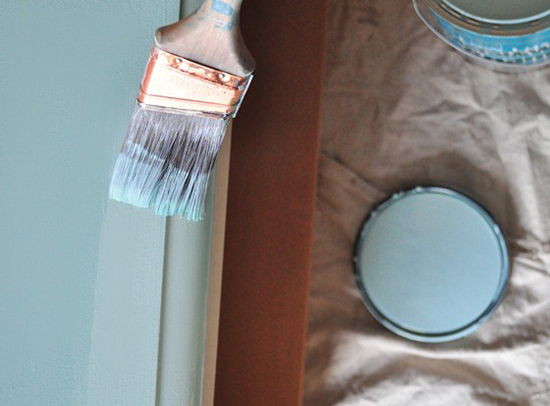
Step 5:
Apply Final Protectant Coat: You can choose anything from flat to semi gloss to refinish your furniture, but it is the final protectant you use that determines the ultimate sheen. You have your choice of several options, water based polycrylic protectant in satin or gloss, or for a hand rubbed matte finish, choose a clear furniture wax protectant (shown above). If you opt for furniture wax, apply several coats buffed to shine between applications. Do not use an oil based polyurethane on white or light paint, it will amber or yellow over time.
Step 6:
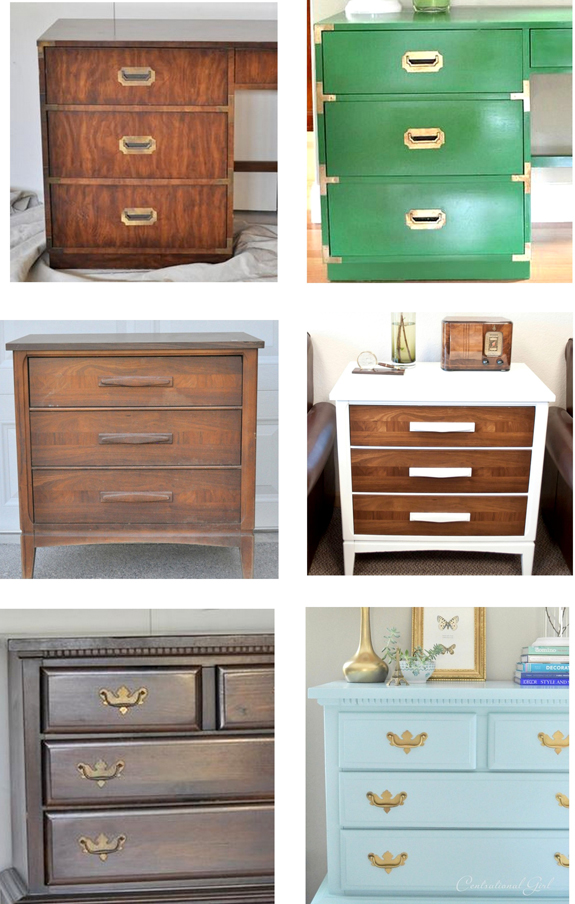
photo: BlackAndDecker.Com
Reattach Hardware: Once the protectant is dry, you are free to reattach all the hardware and bring the piece inside your home! It may seem time-consuming and labor-intensive but with a little patience, you’ll achieve a perfectly painted piece with smooth, even coverage that will last for years to come!
To get more great DIY ideas from Black & Decker Click HERE!